
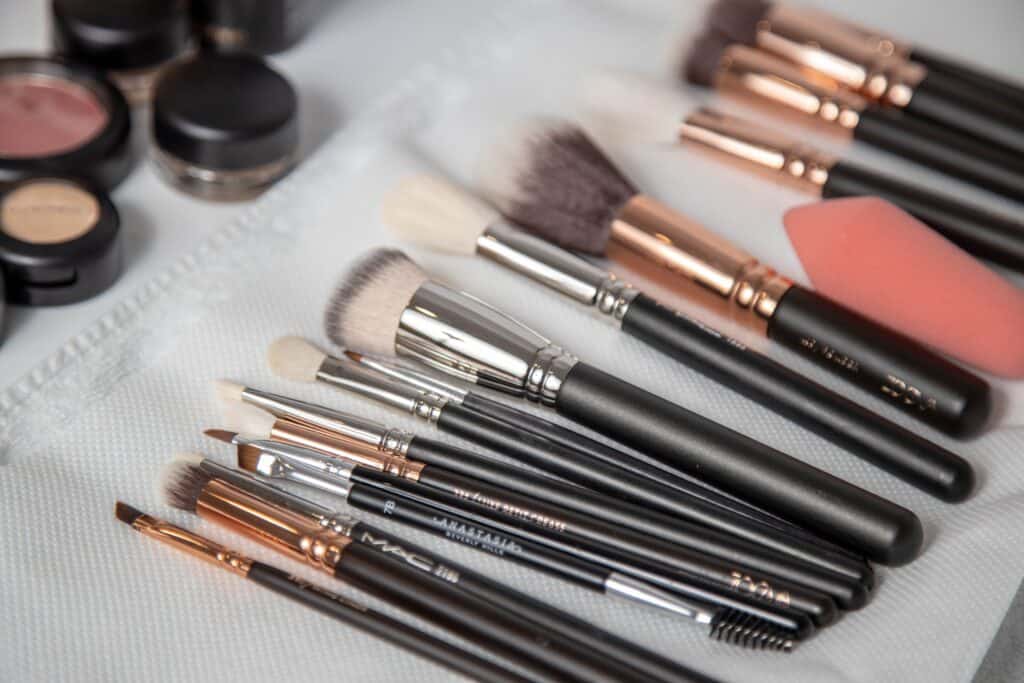
Cleaning my makeup brushes is probably one of my least favorite beauty chores…
It is right up there with washing dishes, lol. But, I know it needs to be done, I know everything will work better afterward, but I still find plenty of reasons to put it off!
Unfortunately, makeup brushes and sponges collect more than leftover foundation and eyeshadow. They also pick up oil, dead skin, dirt, and bacteria every time they touch your face.
That does not mean a dirty makeup brush is automatically responsible for every blemish that appears. Breakouts can have many causes. However, dermatologists agree that dirty beauty tools can contribute to acne, irritation, rashes, and, in more serious situations, infections. They can also make your makeup harder to apply.
If your favorite foundation suddenly looks streaky or cakey, your blush color seems different, or your brushes are no longer blending properly, product buildup may be part of the problem.
The good news is that learning how to clean makeup brushes and sponges isn’t as difficult as you might think! All you need is lukewarm water, a gentle cleanser, a clean towel, and a little patience while everything dries! Let’s dive in!
All product recommendations are independently selected based on my personal experience, testing, and honest opinions. If I include affiliate links, I may earn a small commission if you make a purchase through those links, at no additional cost to you. These commissions help support my blog, but they never influence which products I recommend or the opinions I share.
How Often Should You Clean Makeup Brushes and Sponges?
Here is the easiest schedule to remember:
- Frequently used makeup brushes: Every 7–10 days
- Foundation and concealer brushes: At least once a week
- Brushes used over active breakouts: After every few uses or more frequently
- Reusable makeup sponges: Ideally, after every use, but at least once a week
- Disposable wedge sponges: They should be discarded after one use
The American Academy of Dermatology recommends washing makeup brushes every seven to ten days. Other experts adjust that schedule depending on whether a brush is used with liquid, cream, or powder makeup. Personally, I think a weekly cleaning day is the easiest system. Pick one day when you are not planning to wear makeup, wash the brushes you used that week, and let them dry overnight.
Reusable sponges should be cleaned more frequently because they absorb liquid products and moisture. Beautyblender recommends cleaning its reusable sponges after every use, although some dermatologists acknowledge that once a week may be a more realistic minimum for many people.
What Do You Need to Clean Makeup Brushes?
You do not need an expensive machine or an entire collection of cleaning products.
You will need:
- Lukewarm water
- A gentle brush cleanser, mild shampoo, or gentle face cleanser
- A clean towel or lint-free paper towel
- A small bowl, if you are using a liquid cleanser
- An optional silicone cleaning pad
I personally like the e.l.f. Clean Queen Solid Brush & Sponge Cleaner. It is affordable, comes in a travel-friendly case, and includes a small silicone pad that helps loosen makeup from the bristles.
You wet the brush, swirl it over the solid cleanser, and then work the bristles over the textured pad.
A solid cleanser is also convenient because there is less mess, and you do not have to guess how much liquid soap to pour into a bowl.
For a fragrance-free liquid option, the EcoTools Makeup Brush + Sponge Shampoo is another affordable choice, especially if you prefer to avoid fragranced products.
Whatever you use, choose something gentle. Strong household soaps, rubbing alcohol, and harsh detergents can eventually dry out bristles or make them feel rough.
How to Clean Makeup Brushes Step by Step
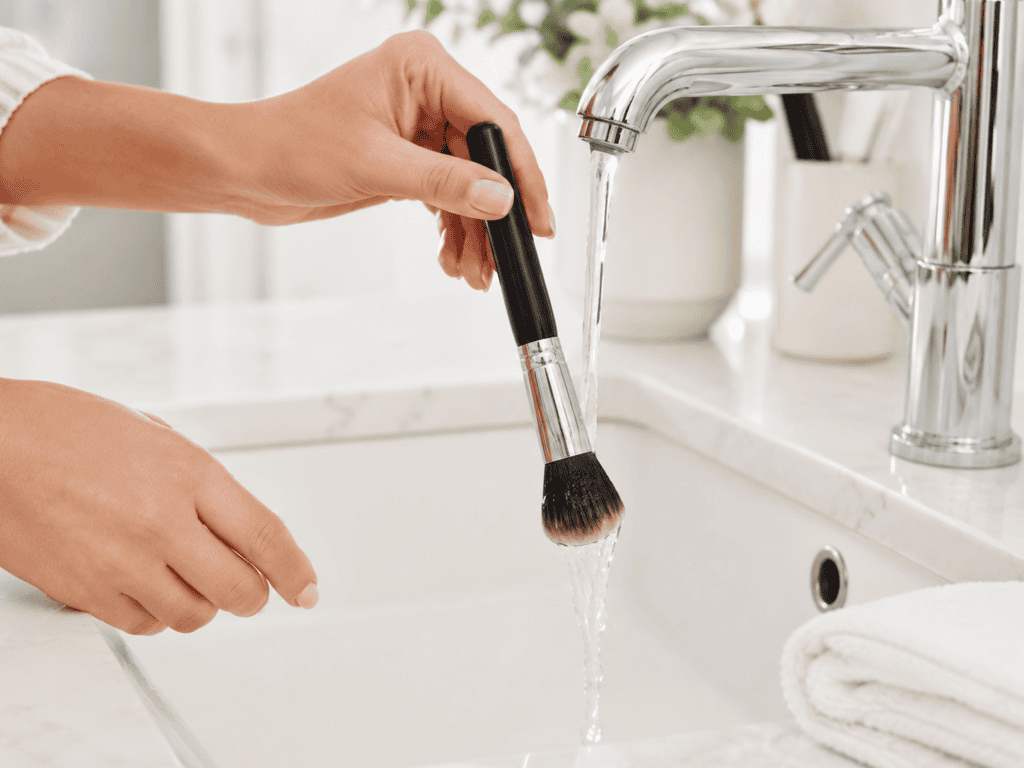
1. Wet Only the Bristles
Hold your brush with the bristles pointing downward and rinse the tips under lukewarm running water.
Try to keep the metal section of the brush, called the ferrule, as dry as possible.
The bristles are glued inside the ferrule. Repeatedly soaking that area can weaken the glue and eventually cause the brush to shed or separate from its handle.
Do not place the entire brush into a bowl of water.
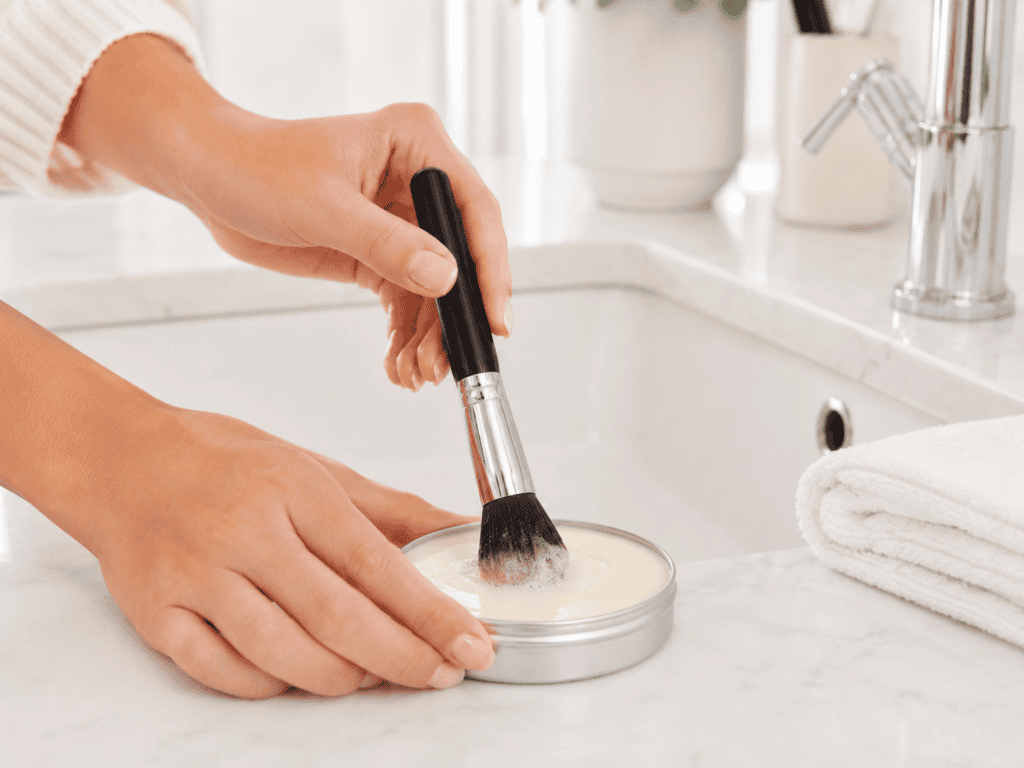
2. Add Your Cleanser
For a solid cleanser, gently move the wet brush back and forth over the soap until it begins to lather.
For a liquid cleanser, place a small amount in the palm of your clean hand or in a small bowl. You generally only need a dime-sized amount for one brush, although a large, dense foundation brush may need a little more.
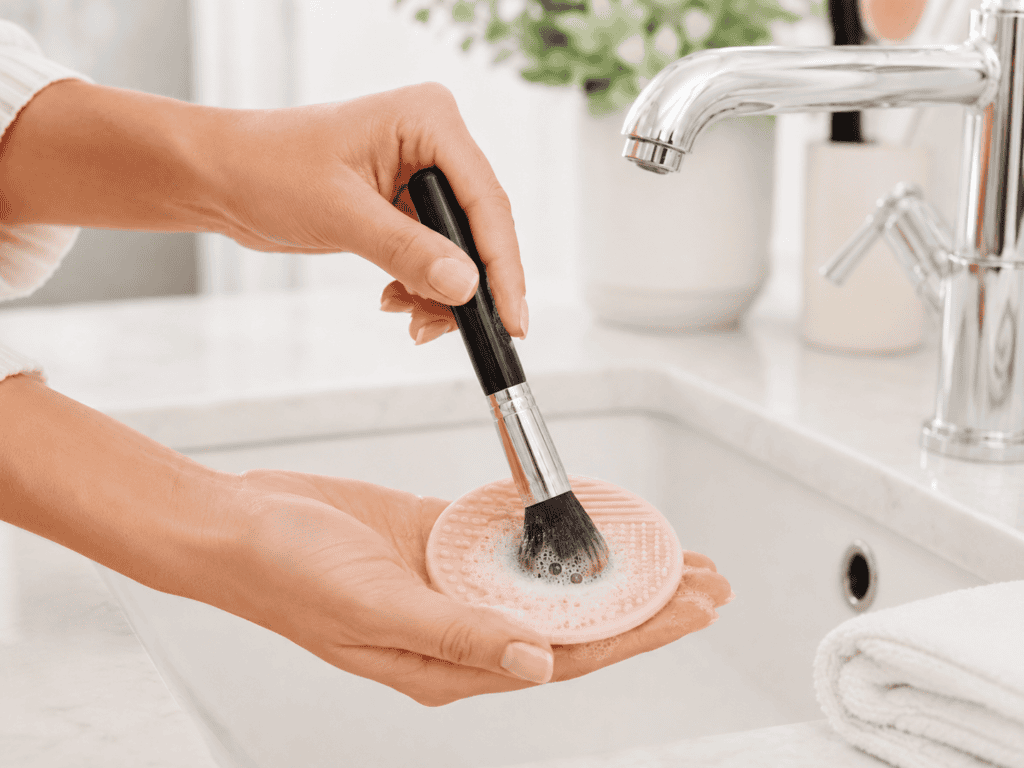
3. Gently Massage the Bristles
Swirl the brush in the palm of your hand or move it gently across a silicone cleaning pad.
You want to loosen the makeup without bending, pulling, or crushing the bristles.
Dense foundation and concealer brushes may need extra attention, as liquid and cream makeup can settle deep within the bristles.
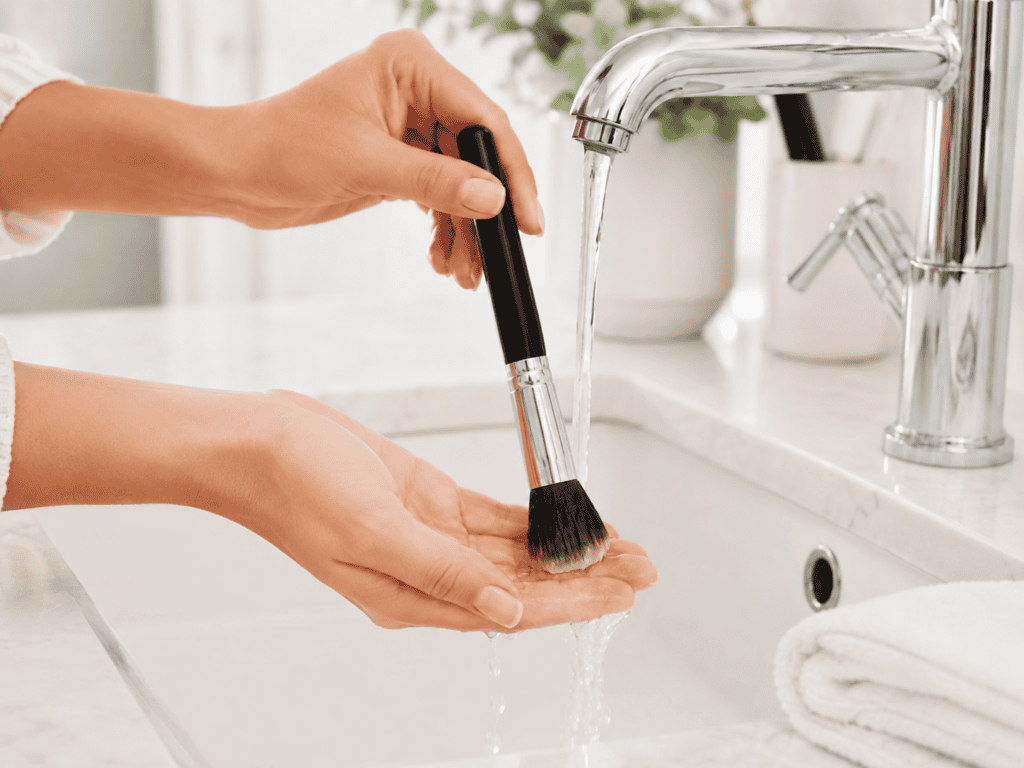
4. Rinse Until the Water Runs Clear
Point the bristles downward and rinse them thoroughly under lukewarm water.
Keep rinsing until the water runs clear and you no longer see makeup or soap coming out of the brush.
If the water still looks cloudy or contains visible pigment, add a little more cleanser and repeat the process.
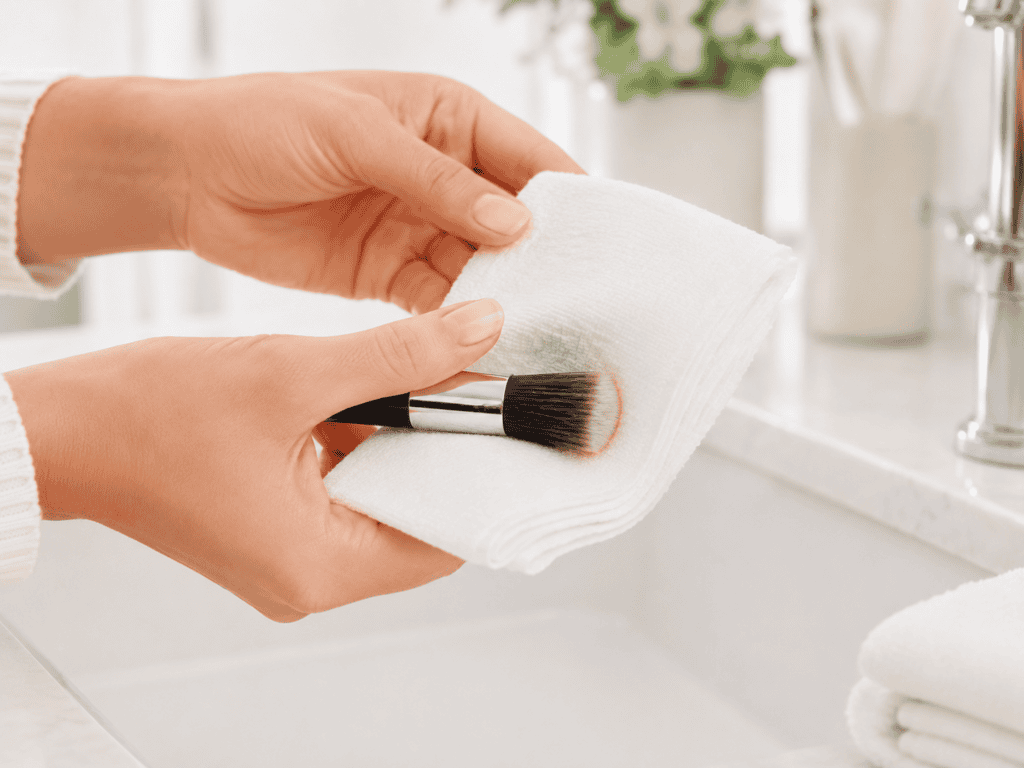
5. Remove the Excess Water
Gently press the bristles between a clean towel or paper towel.
Do not aggressively twist, pull, or wring them.
Once most of the water has been removed, use your fingers to reshape the brush head so the bristles dry in their original position.
How to Dry Makeup Brushes Correctly
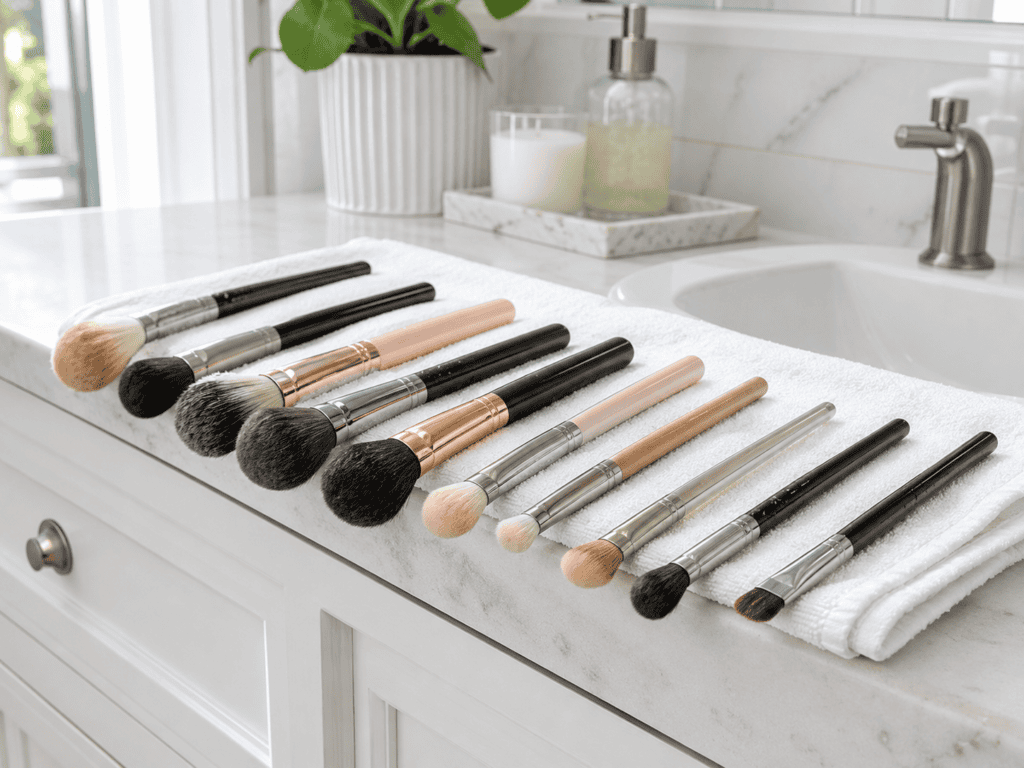
Lay your makeup brushes flat on a clean towel with the bristles hanging slightly over the edge of a counter.
Allowing the brush head to hang over the edge improves airflow and helps the bristles dry evenly.
Do not stand wet brushes upright in a cup. Water can travel into the ferrule and weaken the glue holding the brush together. You should also avoid using a hot blow dryer. Heat can damage the bristles and loosen the glue inside the brush. Most brushes need several hours to dry, and large foundation brushes may need an entire night. I recommend cleaning them when you know you will not need them again until the following morning.
How to Clean Makeup Sponges
Makeup sponges require a slightly different technique because product gets absorbed inside the sponge instead of remaining mostly on its surface.
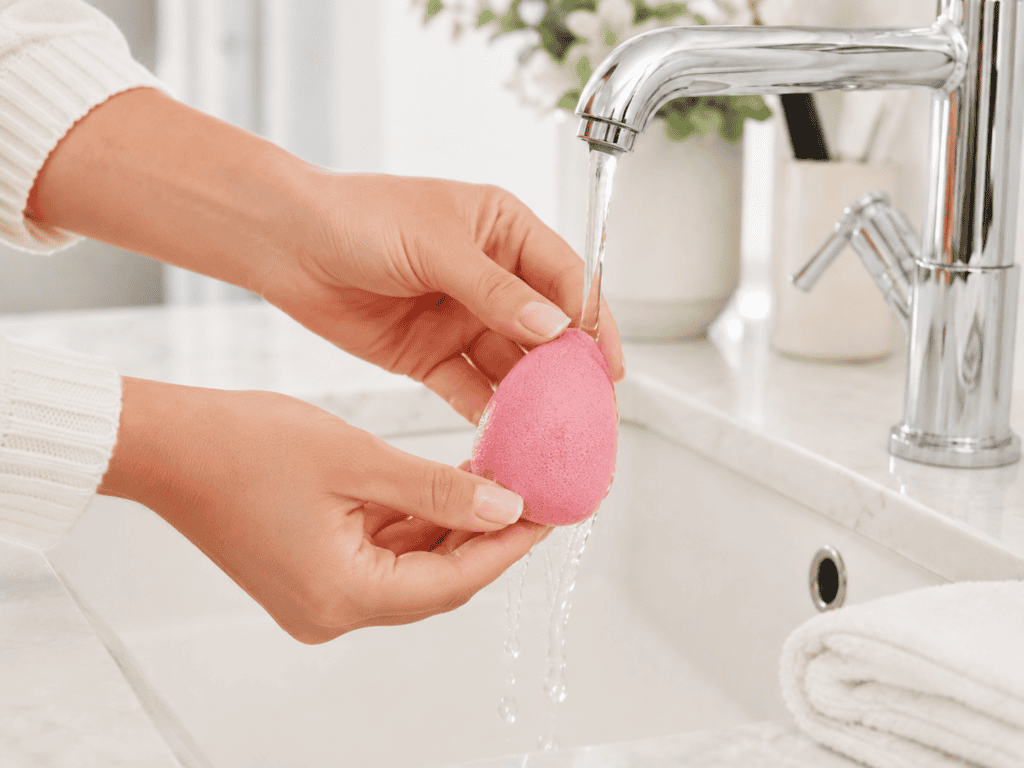
1. Saturate the Sponge
Hold the sponge under lukewarm running water and repeatedly squeeze it until it is completely wet and has expanded.
A fully saturated sponge is easier to clean because water helps push out old makeup from its pores.
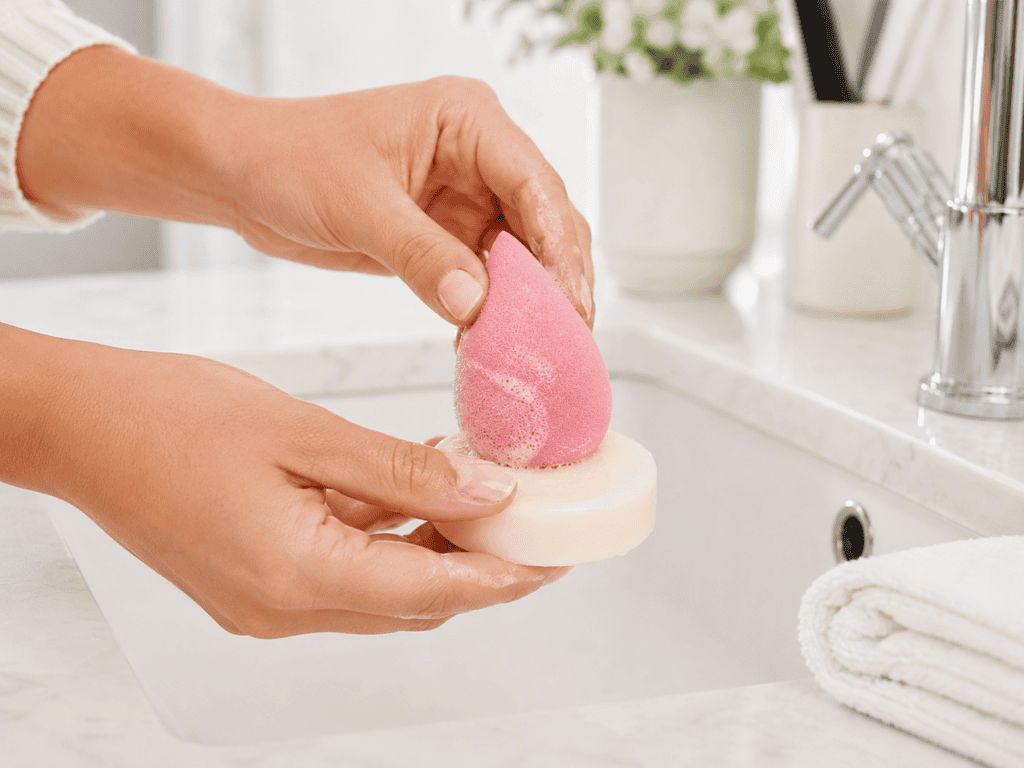
2. Apply Cleanser
Rub the sponge gently over a solid cleanser or apply a small amount of liquid cleanser directly to the sponge.
Massage the cleanser through the sponge using your fingers.
Avoid digging your nails into it or twisting it aggressively. This can create small tears in the foam.
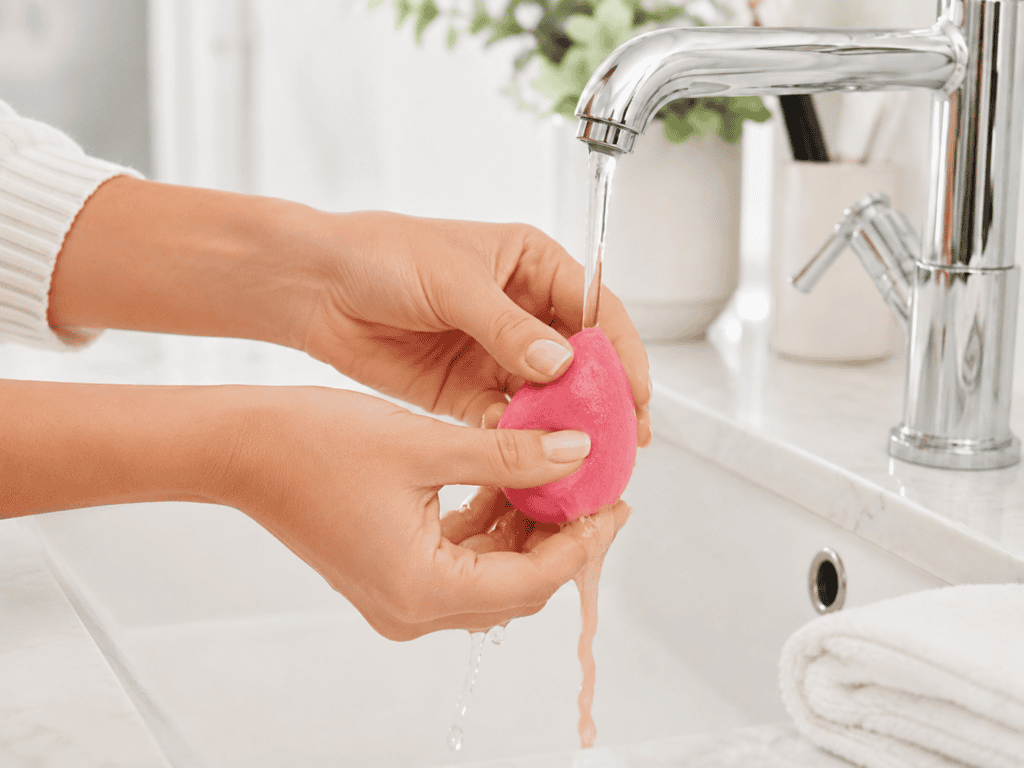
3. Squeeze and Rinse
Squeeze the sponge under running water using a gentle pumping motion.
You will probably see quite a bit of foundation coming out, especially if it has been a while since the sponge was last cleaned.
Continue adding cleanser, squeezing, and rinsing until the water runs clear and no soap remains inside.
Dense sponges may need to be washed more than once.
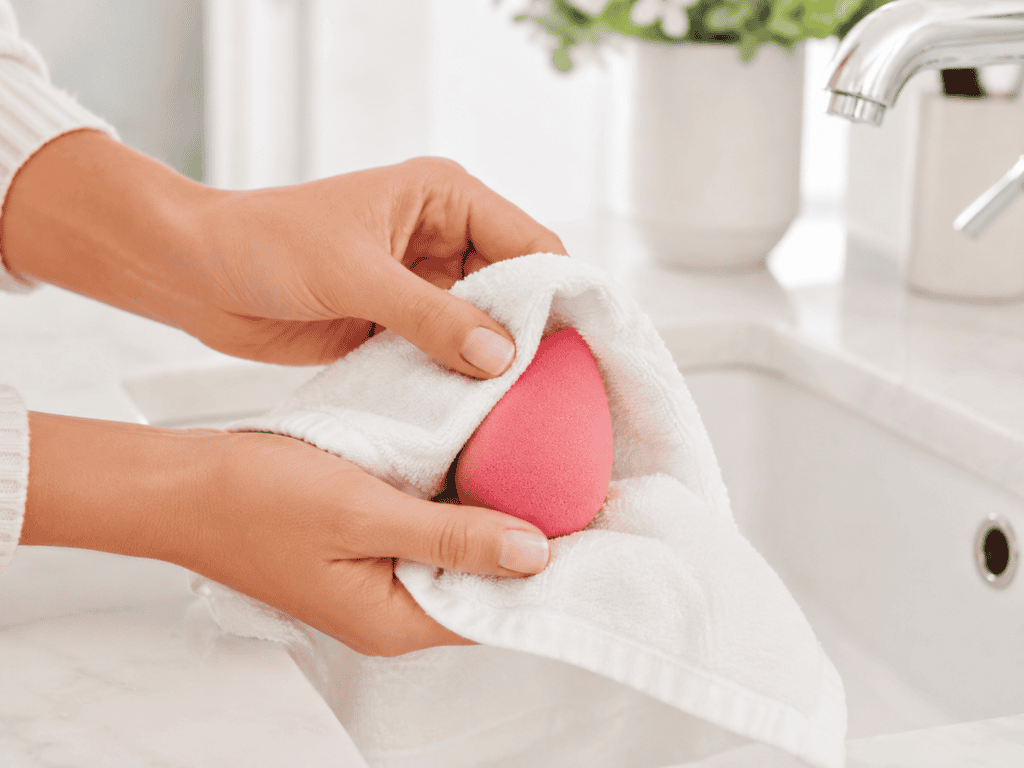
4. Remove Excess Water
Press the sponge inside a clean towel to remove as much water as possible.
Do not store it immediately.
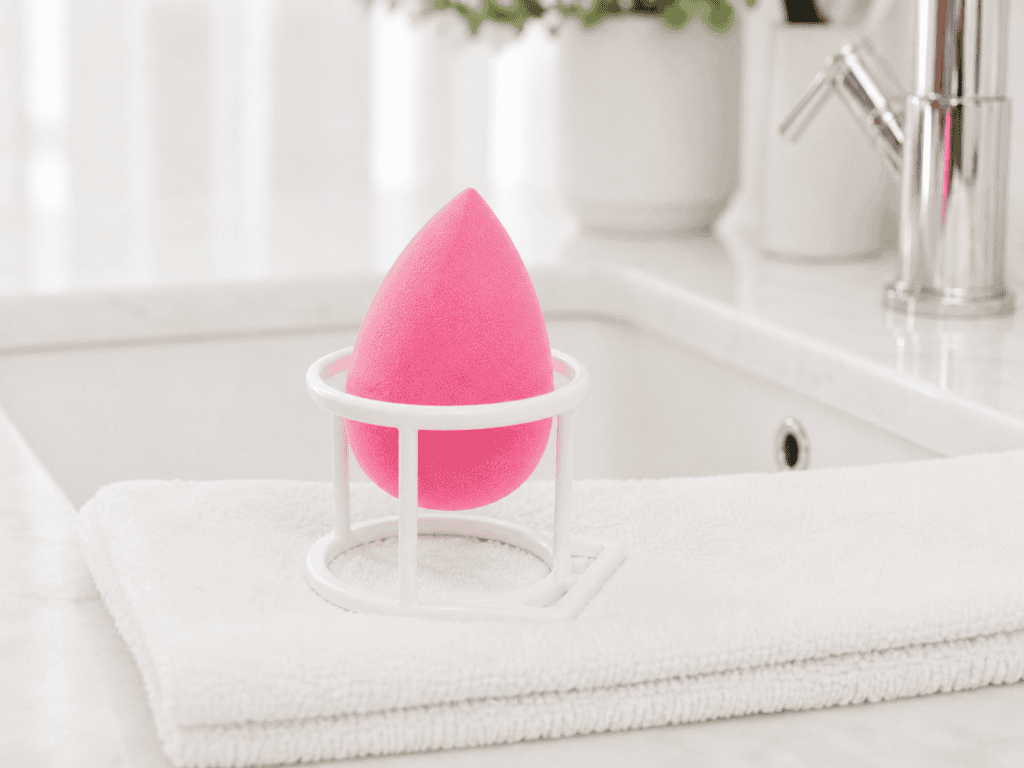
5. Let It Air-Dry Completely
Place the sponge in a clean, well-ventilated area where air can reach it. I personally recommend shopping for one of those cute makeup sponge holders!
Never put a damp sponge into a closed makeup bag, drawer, medicine cabinet, or sealed container. Trapped moisture can encourage bacteria, yeast, and mold growth. A ventilated sponge holder or mesh bag can be helpful, but leaving it uncovered on a clean surface also works.
How Often Should You Replace a Makeup Sponge?
A reusable makeup sponge should generally be replaced about every three months.
Beautyblender states that a well-maintained sponge may last between three and six months, while several beauty experts recommend replacing one every three to four months. I prefer using three months as an easy and slightly more cautious reminder. Think of the changing seasons as your signal to inspect or replace your sponge.
Replace it sooner if:
- It has tears, cracks, or missing pieces
- It has developed an unusual odor
- You notice mold or dark growth
- It no longer returns to its original shape
- It remains damp for an unusually long time
- Makeup buildup will not come out after repeated washing
A permanent foundation stain does not necessarily mean the sponge is still dirty. Some pigment can remain even after the sponge has been thoroughly cleaned.
However, visible mold is never something you should try to wash away. Throw the sponge out immediately.
When Should You Replace Makeup Brushes?
A good makeup brush can last for years when it is cleaned and stored correctly.
Unlike sponges, brushes do not need to be replaced according to a specific calendar.
Replace a brush when:
- The bristles are constantly shedding
- The brush has lost its original shape
- The bristles feel rough or scratchy
- The handle or ferrule has become loose
- It develops an odor that remains after cleaning
- The brush no longer applies or blends makeup properly
A few loose bristles do not automatically mean the brush is finished. However, if you are finding more brush hairs on your face than makeup, it is probably time for a replacement!
Check out our guide to the 11 Best Makeup Brushes and Sponges for a Flawless Finish to find a new tool for your routine!
Common Makeup Brush and Sponge Cleaning Mistakes
Using Very Hot Water
Hot water is unnecessary and may damage brush glue or shorten a sponge’s lifespan. Lukewarm water is warm enough to help loosen makeup without being overly harsh.
Soaking the Entire Brush
Only the bristles need to be washed. Submerging the handle and ferrule can cause shedding, cracking, or separation.
Drying Brushes Upright
Wet brushes should be laid flat, not returned to a standing brush holder immediately.
Storing a Damp Sponge
A sponge needs ventilation until it is completely dry. Do not close it inside a makeup bag while it is still damp.
Depending Only on Cleaning Spray
A quick-drying brush spray can help remove pigment between uses, especially when switching eyeshadow colors.
However, spot cleaning does not replace a proper wash with water and cleanser. Product, oil, and debris can remain deeper inside the bristles.
Sharing Makeup Tools
Avoid sharing brushes and sponges, especially tools used around the eyes or for overactive breakouts. The American Academy of Dermatology specifically advises against sharing makeup brushes.
Can Dirty Makeup Brushes Cause Acne?
Dirty brushes can contribute to acne, but they are rarely the only reason someone is breaking out.
Brushes and sponges can collect oil, dead skin, bacteria, and old product. Repeatedly applying that buildup to the skin may irritate existing acne or become one of several factors contributing to clogged pores.
If you are acne-prone, wash your complexion brushes at least once a week and clean any tool used directly over an active breakout more frequently. If your skin continues to break out after cleaning your tools and reviewing your makeup products, consider speaking with a dermatologist rather than assuming your brushes are the only cause. It is also important to remove your makeup thoroughly each night, so check out our guide to the 7 Best Makeup Removers for Every Skin Type for options that can help keep your skin feeling clean and refreshed.
Final Thoughts on Cleaning Makeup Brushes and Sponges
Cleaning your makeup tools may never become your favorite part of your beauty routine.
It definitely is not mine!
However, once you get into the habit of doing it every week, the process becomes much easier. Your brushes will feel softer, your makeup will blend more smoothly, and you will not be repeatedly applying weeks of old product back onto your face.
The basic routine is simple:
Use lukewarm water, choose a gentle cleanser, keep the brush ferrule dry, rinse everything thoroughly, and allow your tools to air-dry completely.
Your makeup brushes, sponges, and skin will all be better for it. For more beauty tips, product recommendations, and step-by-step guides, visit our Makeup page!



I always forget to clean my brushes. How often do you recommend doing it for the best results?
Hi Alice!
I recommend the following:
Frequently used makeup brushes: Every 7–10 days
Foundation and concealer brushes: At least once a week
Brushes used over active breakouts: After every few uses or more frequently
Reusable makeup sponges: Ideally, after every use, but at least once a week
Disposable wedge sponges: They should be discarded after one use
🙂 hope this helps! Thanks for reading!